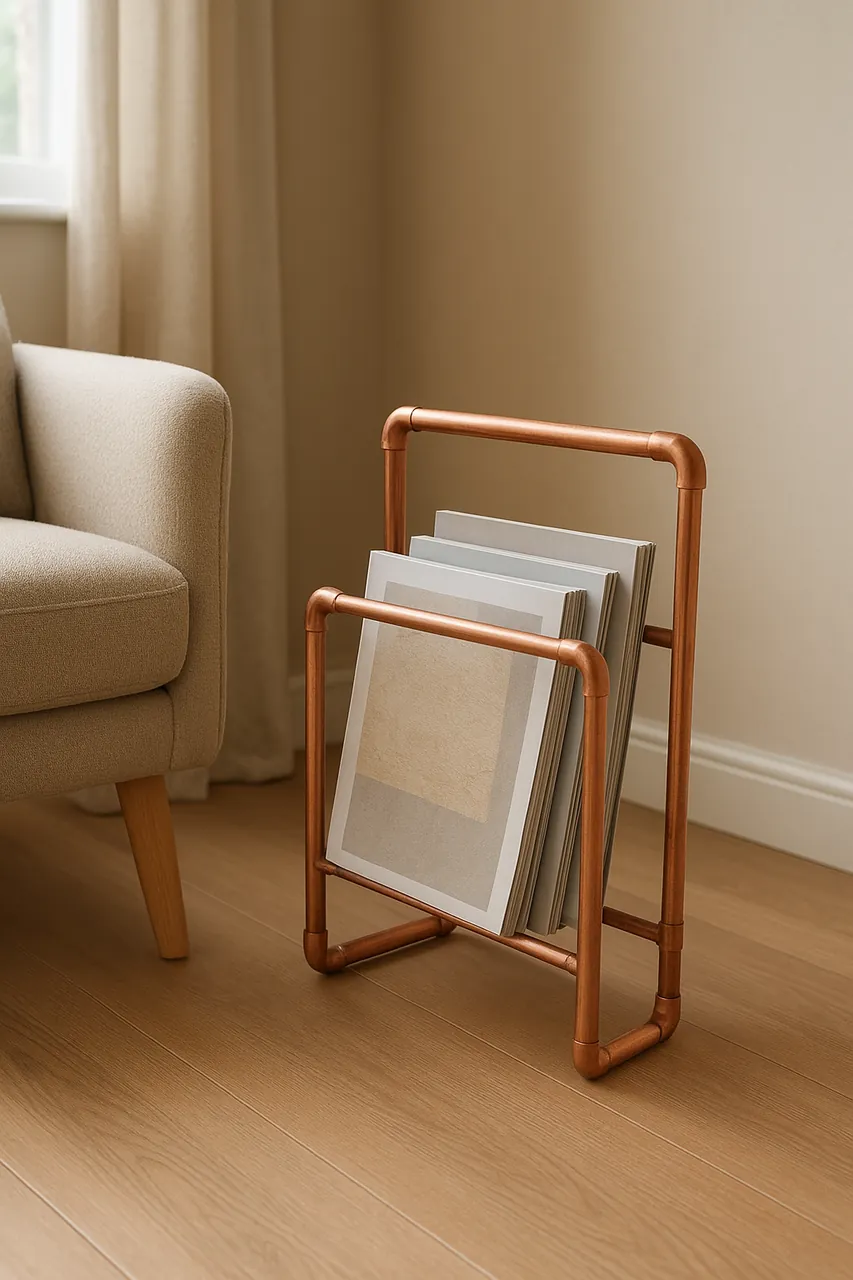
Copper pipe left over from a plumbing project can become a useful piece of furniture rather than sitting in a garage bin. Its warm finish needs no covering, and ordinary 90-degree elbows provide the corners of a slim, freestanding magazine rack.
The finished rack has two open rectangular sides joined across the bottom. Magazines stand between them, with their covers visible through the frame. It offers storage without the visual weight of a cabinet or basket and can sit beside a sofa, reading chair or desk.
Gather the pipe and fittings
This project uses one 2-metre length of copper pipe, 12 copper 90-degree connectors, strong adhesive and a pipe cutter. The joints are glued, so there is no soldering. The same copper tubing supplies both the structure and the decorative finish; it does not need to be hidden under paint or another material.
The lengths have different jobs. Short pieces shape the bottom of the rack, four equal sections become uprights, and two long pieces form the top rails. Keeping track of those groups before assembly makes the frame easier to build and helps the two sides match.
Measure and cut all 12 sections
Mark the full pipe before making the first cut. It needs to yield four 10 cm pieces, two 8 cm pieces, two 30 cm pieces and four 21 cm pieces. Together, those measurements use the entire 2-metre length, so check the marks carefully before cutting.
Clamp the pipe cutter around the first marked point and rotate it around the tubing to score the copper. Tighten the cutter after each pass, then keep rotating until its wheel cuts through the pipe. Repeat at the remaining marks to produce all 12 sections.
Aim for clean, square ends. Each cut end must sit inside a connector, and an angled cut can affect the alignment when several pieces are joined into a rectangle. Once cutting is complete, group the sections by length rather than reaching for them one at a time during assembly.
Lay out the pieces before gluing
Set the two 8 cm pieces aside as the short centre portions of the bases. The four 10 cm pieces extend those bases, while the four 21 cm lengths will stand upright. The two 30 cm pieces span the top of the rack. Laying them out in these groups shows how the small sections will become a larger frame.
There are two matching base units to make. Each starts as a shallow U, with an 8 cm section across its centre and a 10 cm section extending from each elbow. Matching their spacing matters: if one base is set at a different angle, the upper parts may not meet neatly.
Build and glue the two bases
Fit a 90-degree elbow to each end of an 8 cm section. Push one 10 cm piece into each elbow to form the first shallow U, then repeat with the second 8 cm section and the remaining two 10 cm pieces. These two forms establish the footprint that supports the rack.
Apply strong adhesive around the pipe ends before pushing them into their fittings. Wipe away any glue forced out of a joint before it sets. Keep each elbow aligned with its partner as you work; a small shift at the base becomes more noticeable when the tall pipes are in place.
Check that the two U-shaped units have the same spacing between their parallel sections. Let the adhesive set before adding more pipe, since moving a joint while it is still loose can change the angle of an elbow and leave the rack twisted.
Turn the frame upward
Fit another elbow onto each exposed end of the two bases. Rotate all four openings upward, changing the direction of the frame from horizontal to vertical. At this stage, the bases should be ready to receive four upright pipes.
Insert a 21 cm section into each upward-facing connector. These four pipes establish the height of the rack and form the sides of the space where magazines will stand. Keep the matching uprights aligned as the frame grows.
Attach the four remaining elbows to the ends of the two 30 cm sections, using adhesive at the joints as before. These longer assemblies will become the top rails. Fit each rail onto a pair of uprights to close the two rectangular sides.
Before the adhesive cures, check the rack on a flat surface. All four bottom sections should meet that surface without a corner lifting. This is the time to correct the alignment of the elbows so the finished piece stands evenly.
Leave the copper on show
The exposed copper is part of the design, not a surface that needs concealing. Its rounded elbows soften the rectangular outline, and the visible joints show how the piece is put together. The open construction also lets the floor, nearby furniture and the magazines remain visible through the rack.
Slide magazines and thin books between the parallel copper sides rather than stacking them on a table. The upright rails hold them in position, while the low base supports their bottom edges. With its simple frame and visible finish, the leftover pipe becomes both practical storage and a piece of decor.